Checkmate With King and Rook
How frustrating is it when you play a great game and find yourself with a rook against a lonely king but cannot deliver checkmate? This article teaches you everything you need to know about a checkmate with a rook to avoid that tragic situation.
- Why Should You Learn How To Checkmate With A Rook?
- How To Deliver Checkmate With A Rook And King
- Step One: Put The Opponent's King Inside A Box
- Step Two: Stare At The Opponent's King And Check
- Waiting Moves
- Test Your Skills
- Conclusion
Why Should You Learn How To Checkmate With A Rook?
Checkmating your opponent is your ultimate goal when playing chess. To do that successfully, you must understand the ideas behind basic checkmating patterns.
Since rooks usually are the last pieces to be developed and brought into the game, they are also the pieces that often stay on the board longer. Because of that, rook endgames are very frequent and, therefore, knowing how to checkmate your opponent with only a rook and a king is crucial.

How To Deliver Checkmate With A Rook And King
There are a few different methods you can use to checkmate your opponent using a rook and a king. We review the simplest of them, which is easier to remember and just as effective as more complicated techniques.
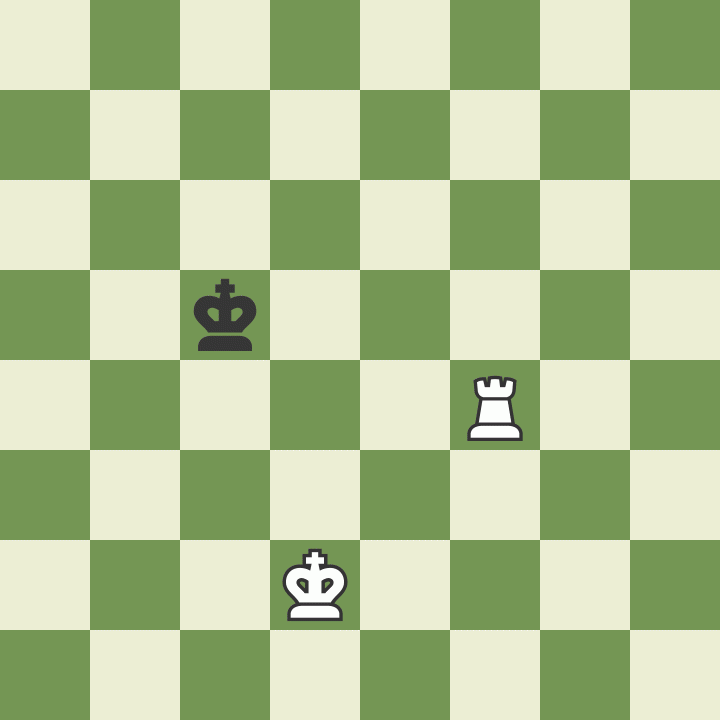
Before we start, here is the final position we are striving to achieve.
You must pay attention to two details in this position. The first is that you need to press your opponent's king against the edge of the board so your rook can attack it from the side. The second is that your king has to be directly in front of the black king to block its access to the three escape squares.
Here is an example of how you can get to this position.
Now that you have seen this mating pattern in action, let's break it down so you can start delivering it yourself.
Step One: Put The Opponent's King Inside A Box
Forcing the opponent's king to the edge of the board starts with putting the enemy king inside a box. You can do that with the help of your rook.
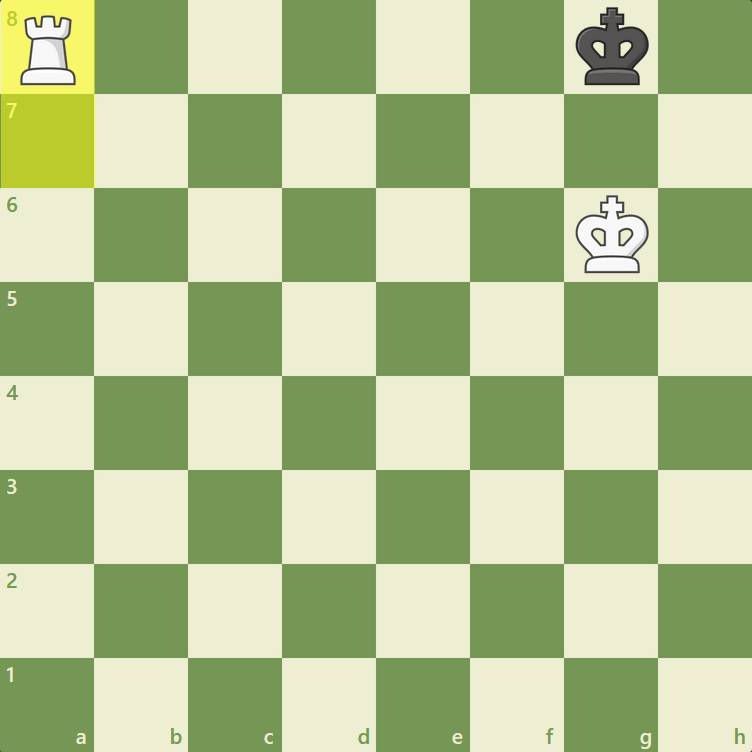
Imagine the following starting position with the enemy king on c5 and your rook on f3:

Moving the rook one file below the black king creates a box that gets smaller and smaller as the checkmating pattern progresses. Every time the black king moves up, your rook moves closer to it to make the box smaller.

After you finish this first step, you are ready to move on to step two. Just a reminder: Keep your rook safe at all times, or the game can end in a draw.

Step Two: Stare At The Opponent's King And Check
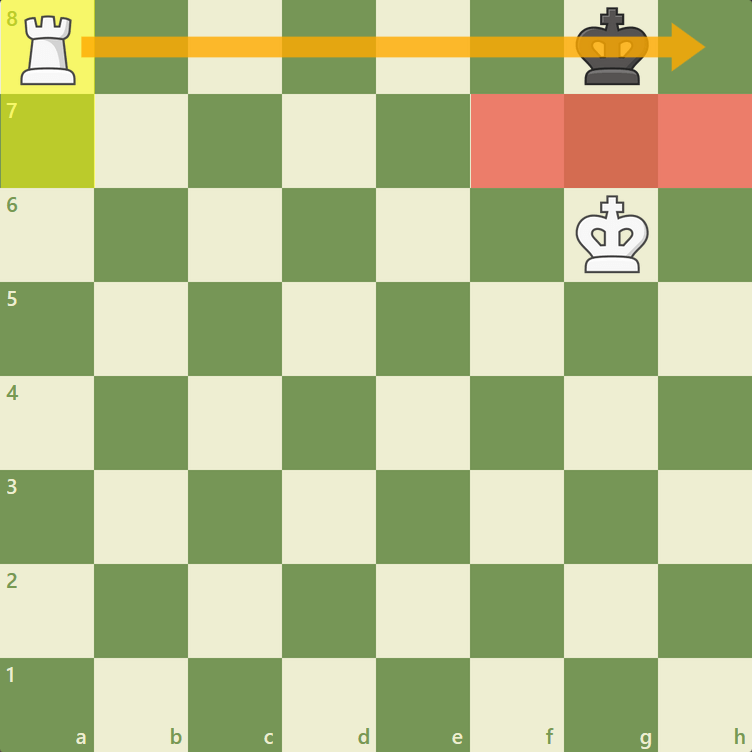
After you put the opponent's king in a box, it is time to start pushing it to the board's edge.
Remember how, in the final position, you were able to deliver checkmate because your king was blocking the escape squares for the black king? The second step of this checkmate follows that same idea. You have to put your king directly in front of the black king—giving it the death stare!
Do you notice what happens in this situation? Your king restricts the black king's movements. If you give a check now, Black is forced to move backward, getting closer to the guillotine.

After you successfully do this, you are ready to repeat this two-step process until you get to the board's edge and checkmate your opponent.
Waiting Moves
There is one last concept you need to learn to be able to mate your opponent with a rook.
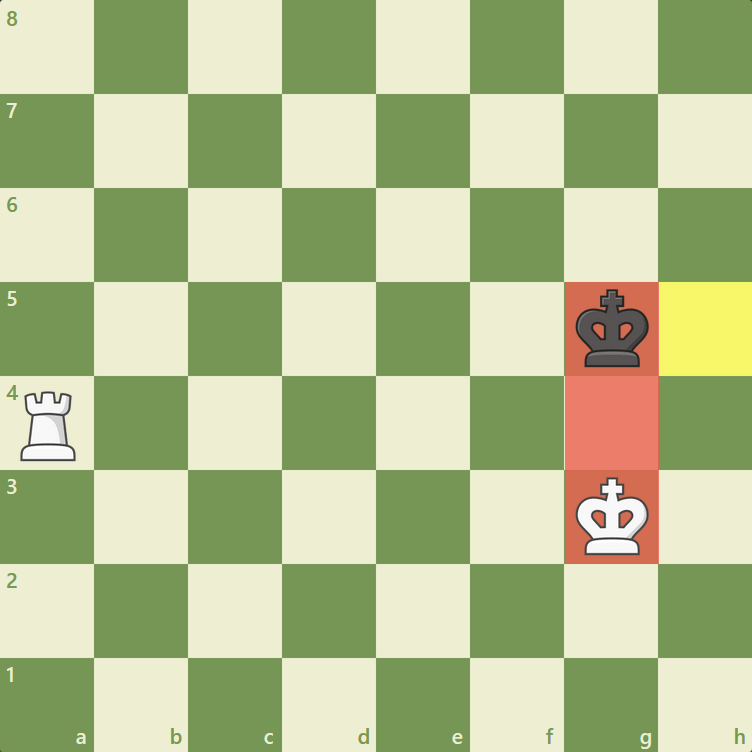
Sometimes you need to perform a waiting move to complete the second step of this mating pattern. Imagine the following scenario:

If you carelessly move in front of the opponent's king in this position, Black can easily avoid your death stare by stepping aside with their king.
As you can see, you need to wait until the black king steps in front of your king. Only then do you have time to deliver a check and force the black king to move closer to its ruin. You can do that by making a waiting move with your rook. Since Black cannot refuse to move in their turn, there is no salvation for their king.

Test Your Skills
Now that you know the theory behind this checkmating pattern, it is time to practice it. Solve the puzzles below by applying the two-step technique you have just learned.
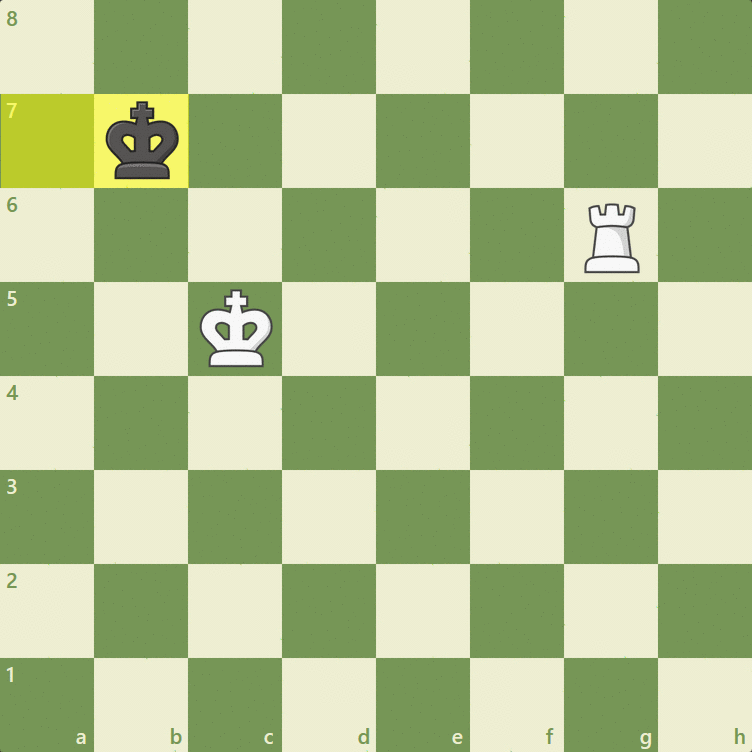
Puzzle 1: You get to an endgame where you have a rook and a king against the opponent's solitary king. What should you do to start the mating pattern?
Puzzle 2: The enemy king just stepped in front of your king. What should you do?
Puzzle 3: Your opponent is trying to trick you. They just stepped back with their king again before you could approach it with your king. What should you do?
Conclusion
You now know how to checkmate using only a rook and your king. Try out our premium membership and head over to our Drills page to practice this essential mating pattern against the computer so you can do it effortlessly over the board.